• Skip to main content
  • Skip to footer
Green Jay Landscape Design

Green Jay Landscape Design

Green Jay Landscape Design

(914) 560-6570
  • Design
  • Installation
  • Portfolio
  • Pricing
  • About
    • Service Area
    • Meet Our Team
    • Our Process
    • Our Promise
    • Mission, Vision, & Core Values
    • FAQ
    • Press & Events
    • Blog
    • Reviews
    • Careers
    • Affiliations
    • Newsletter Sign-up
  • Contact

greenjayadmin

We’ve created this extraordinary composition here in Westchester County, Dream Window / Lakeside Masterpiece. It features combined elements of nature, the far east as well as Australian and European influences. The project includes regular maintenance and management of this lakeside property.

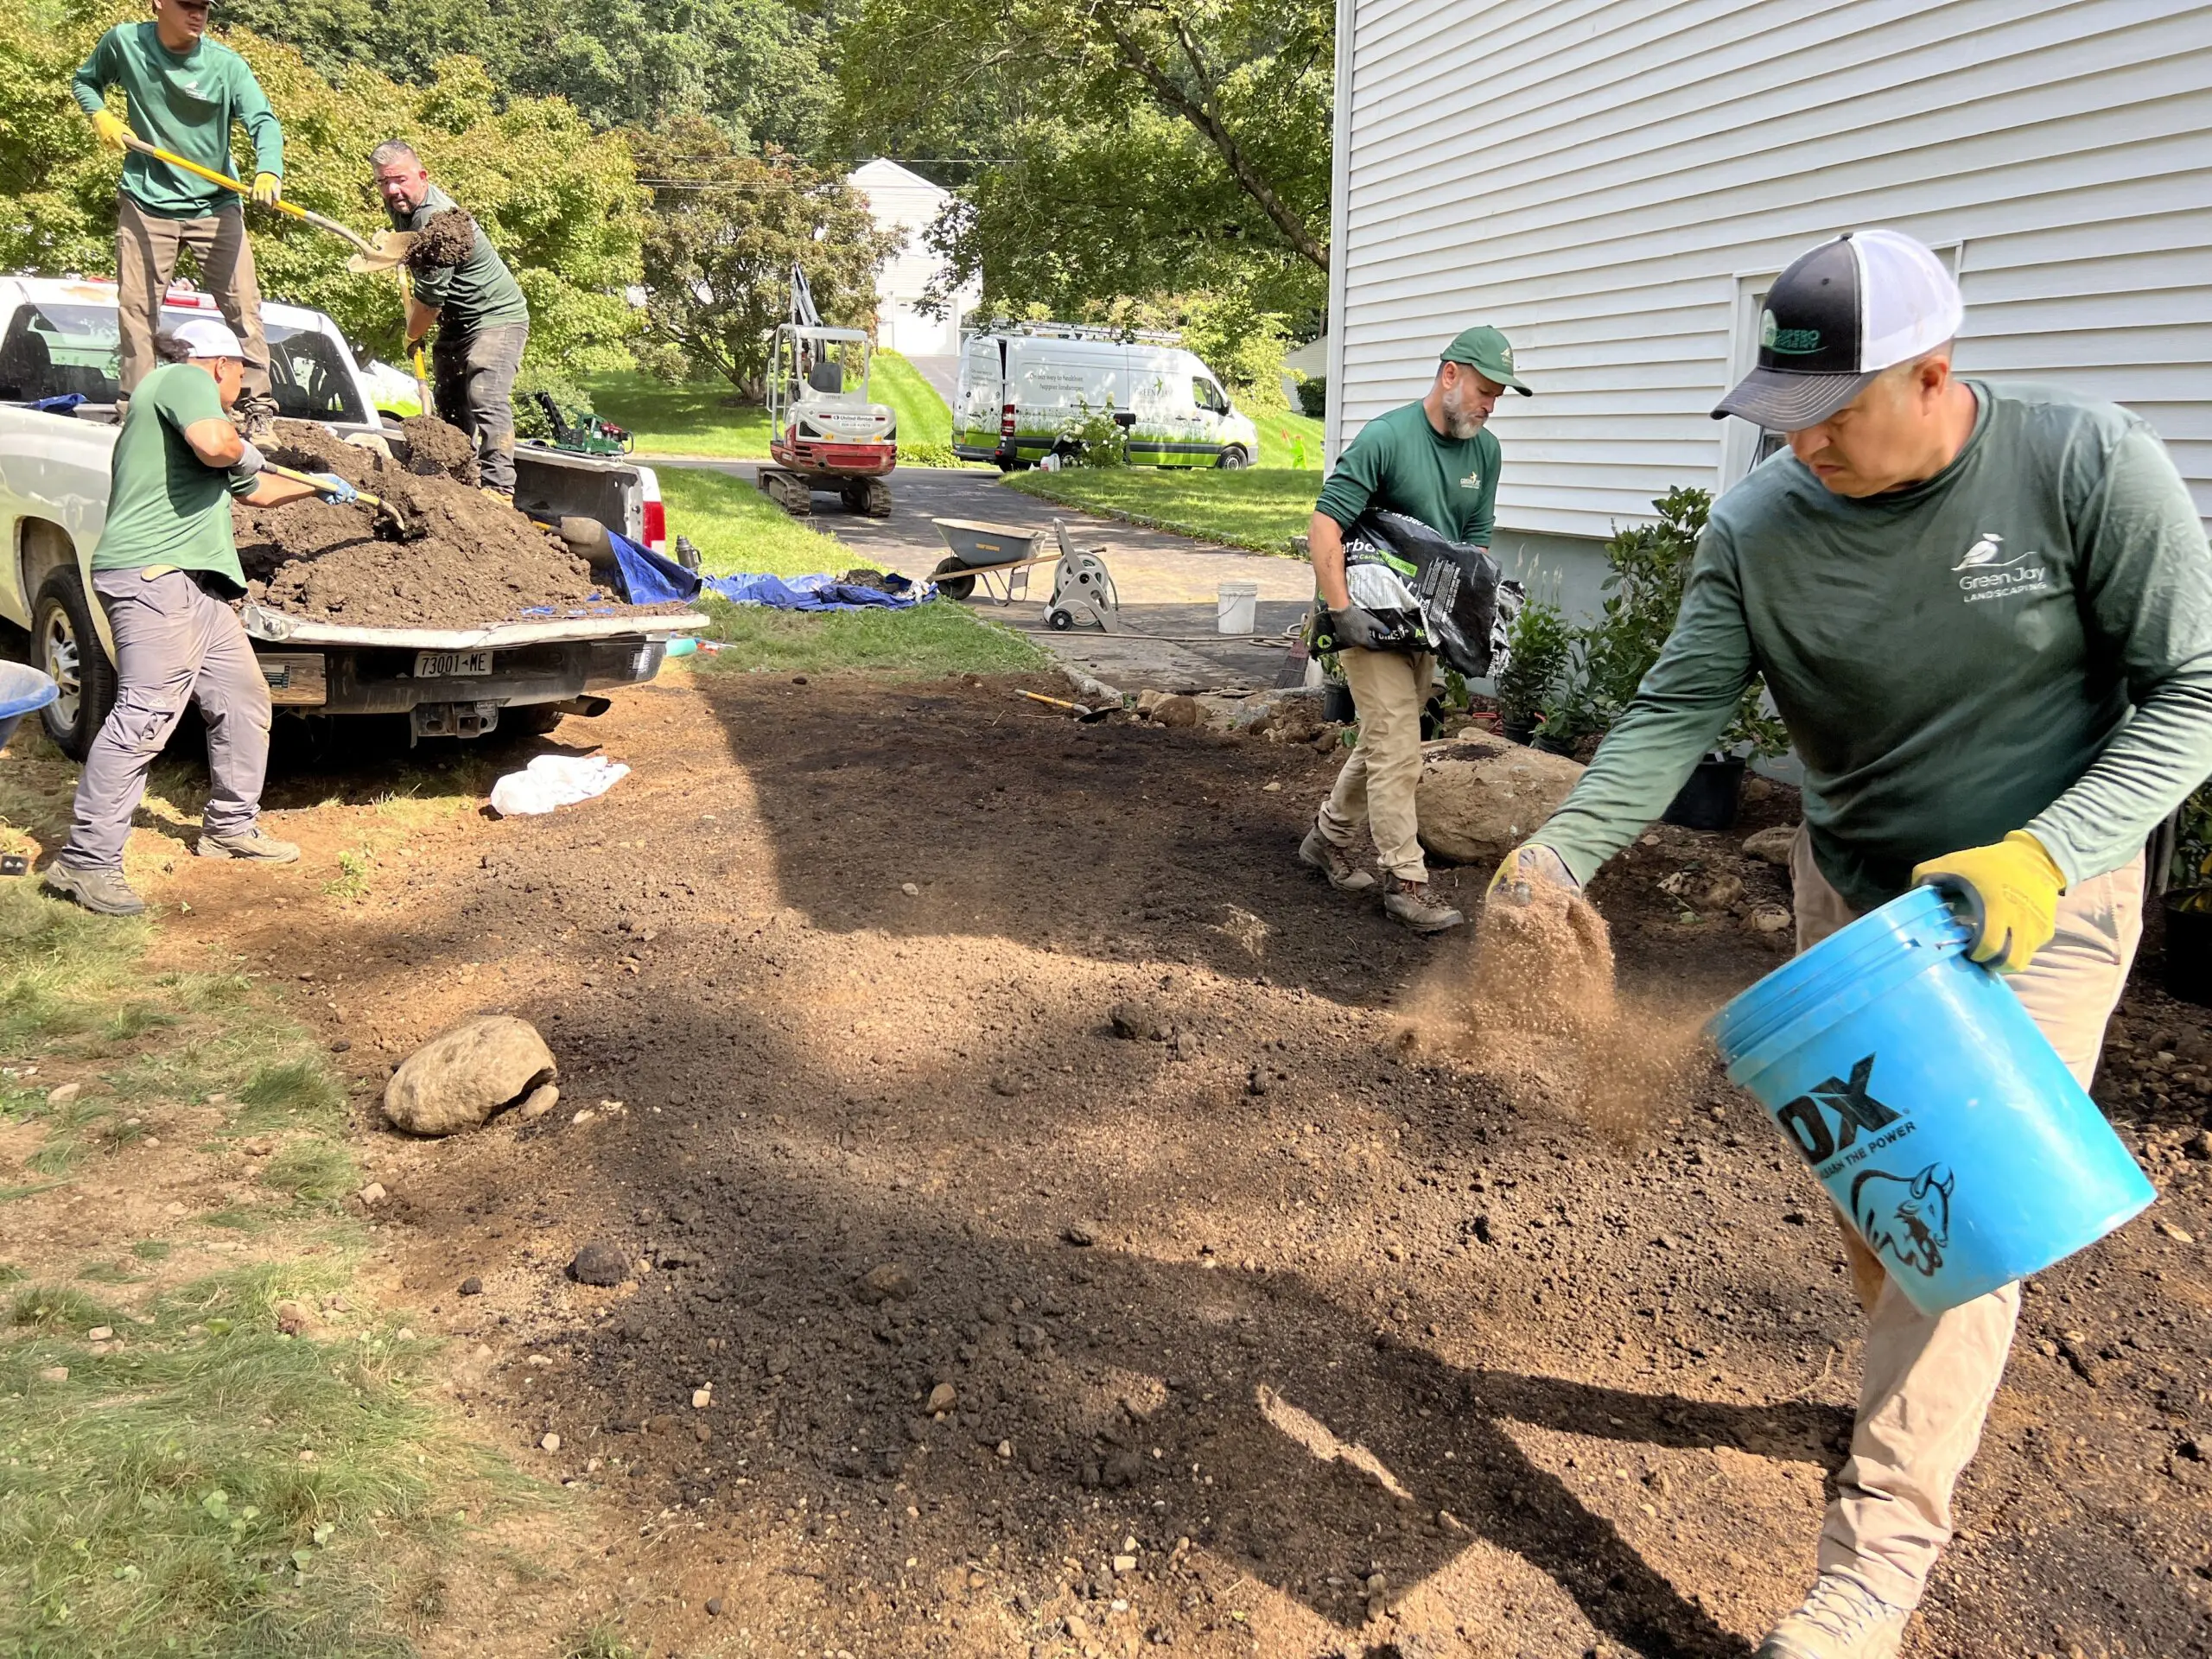
Part of the scope of this project was to use locally sourced stone to enhance the steps leading down to the lake, to construct paths and patios in the backyard lakeside area and for lakeside bank restoration.


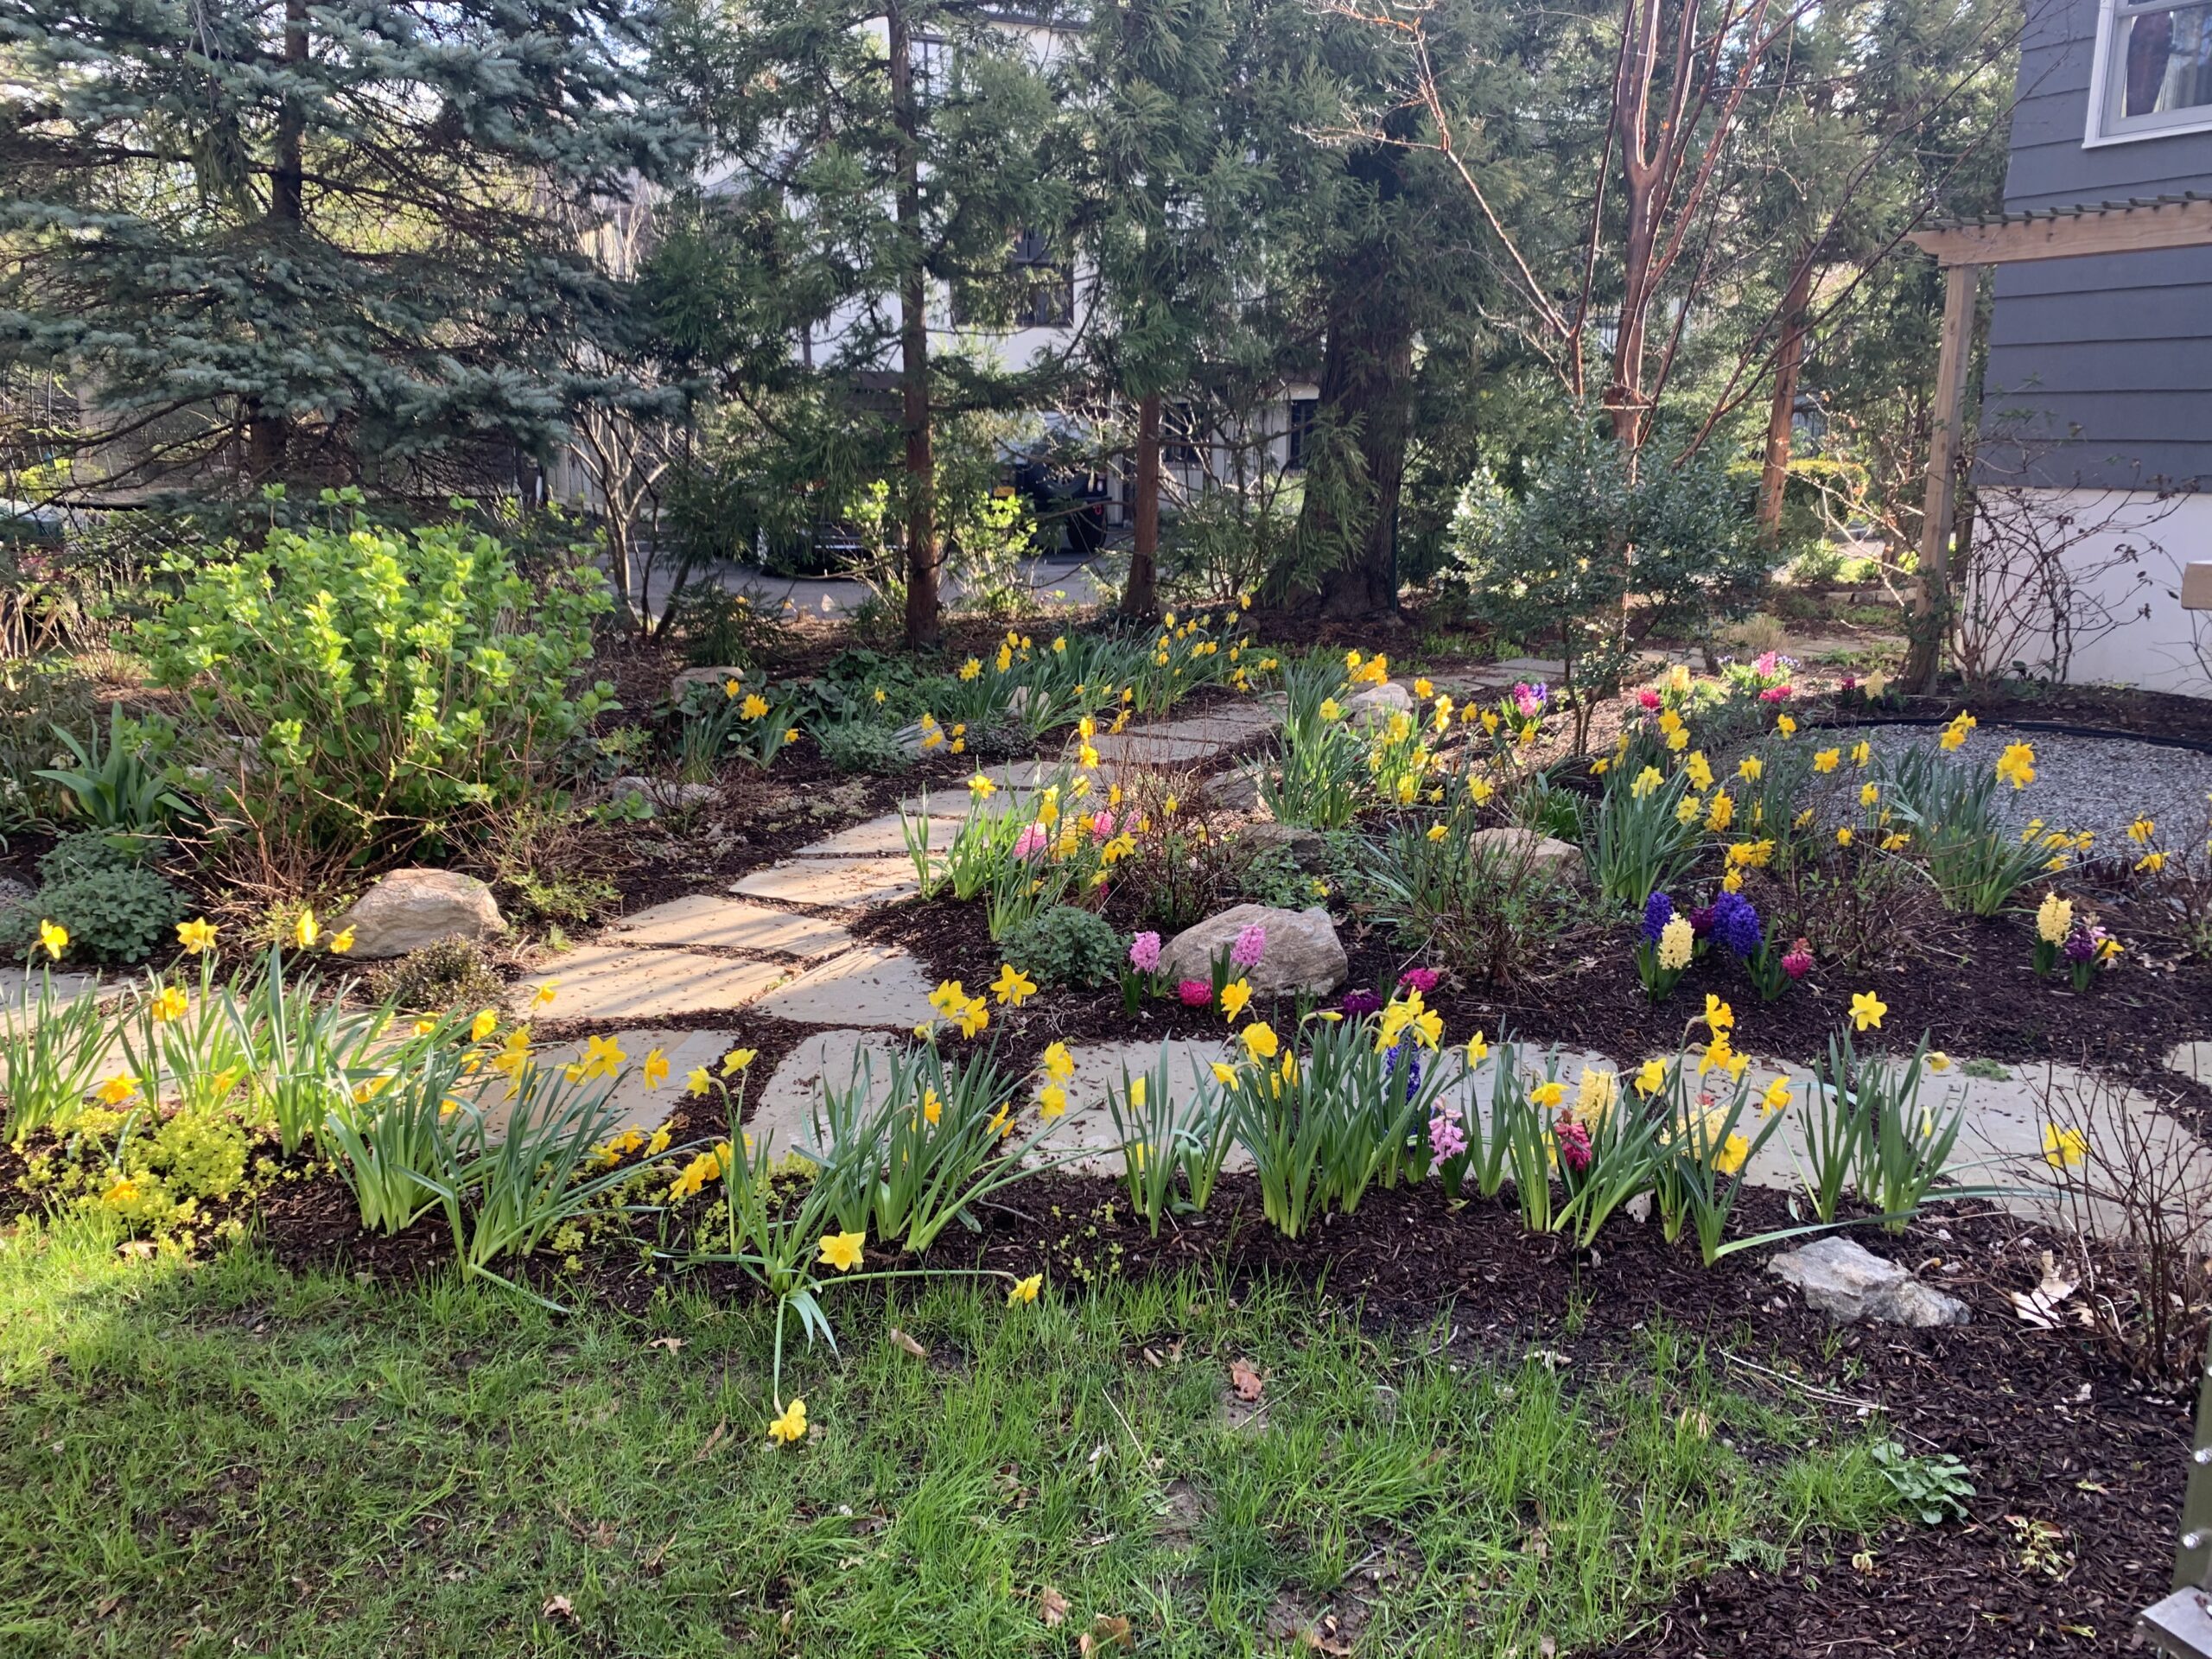
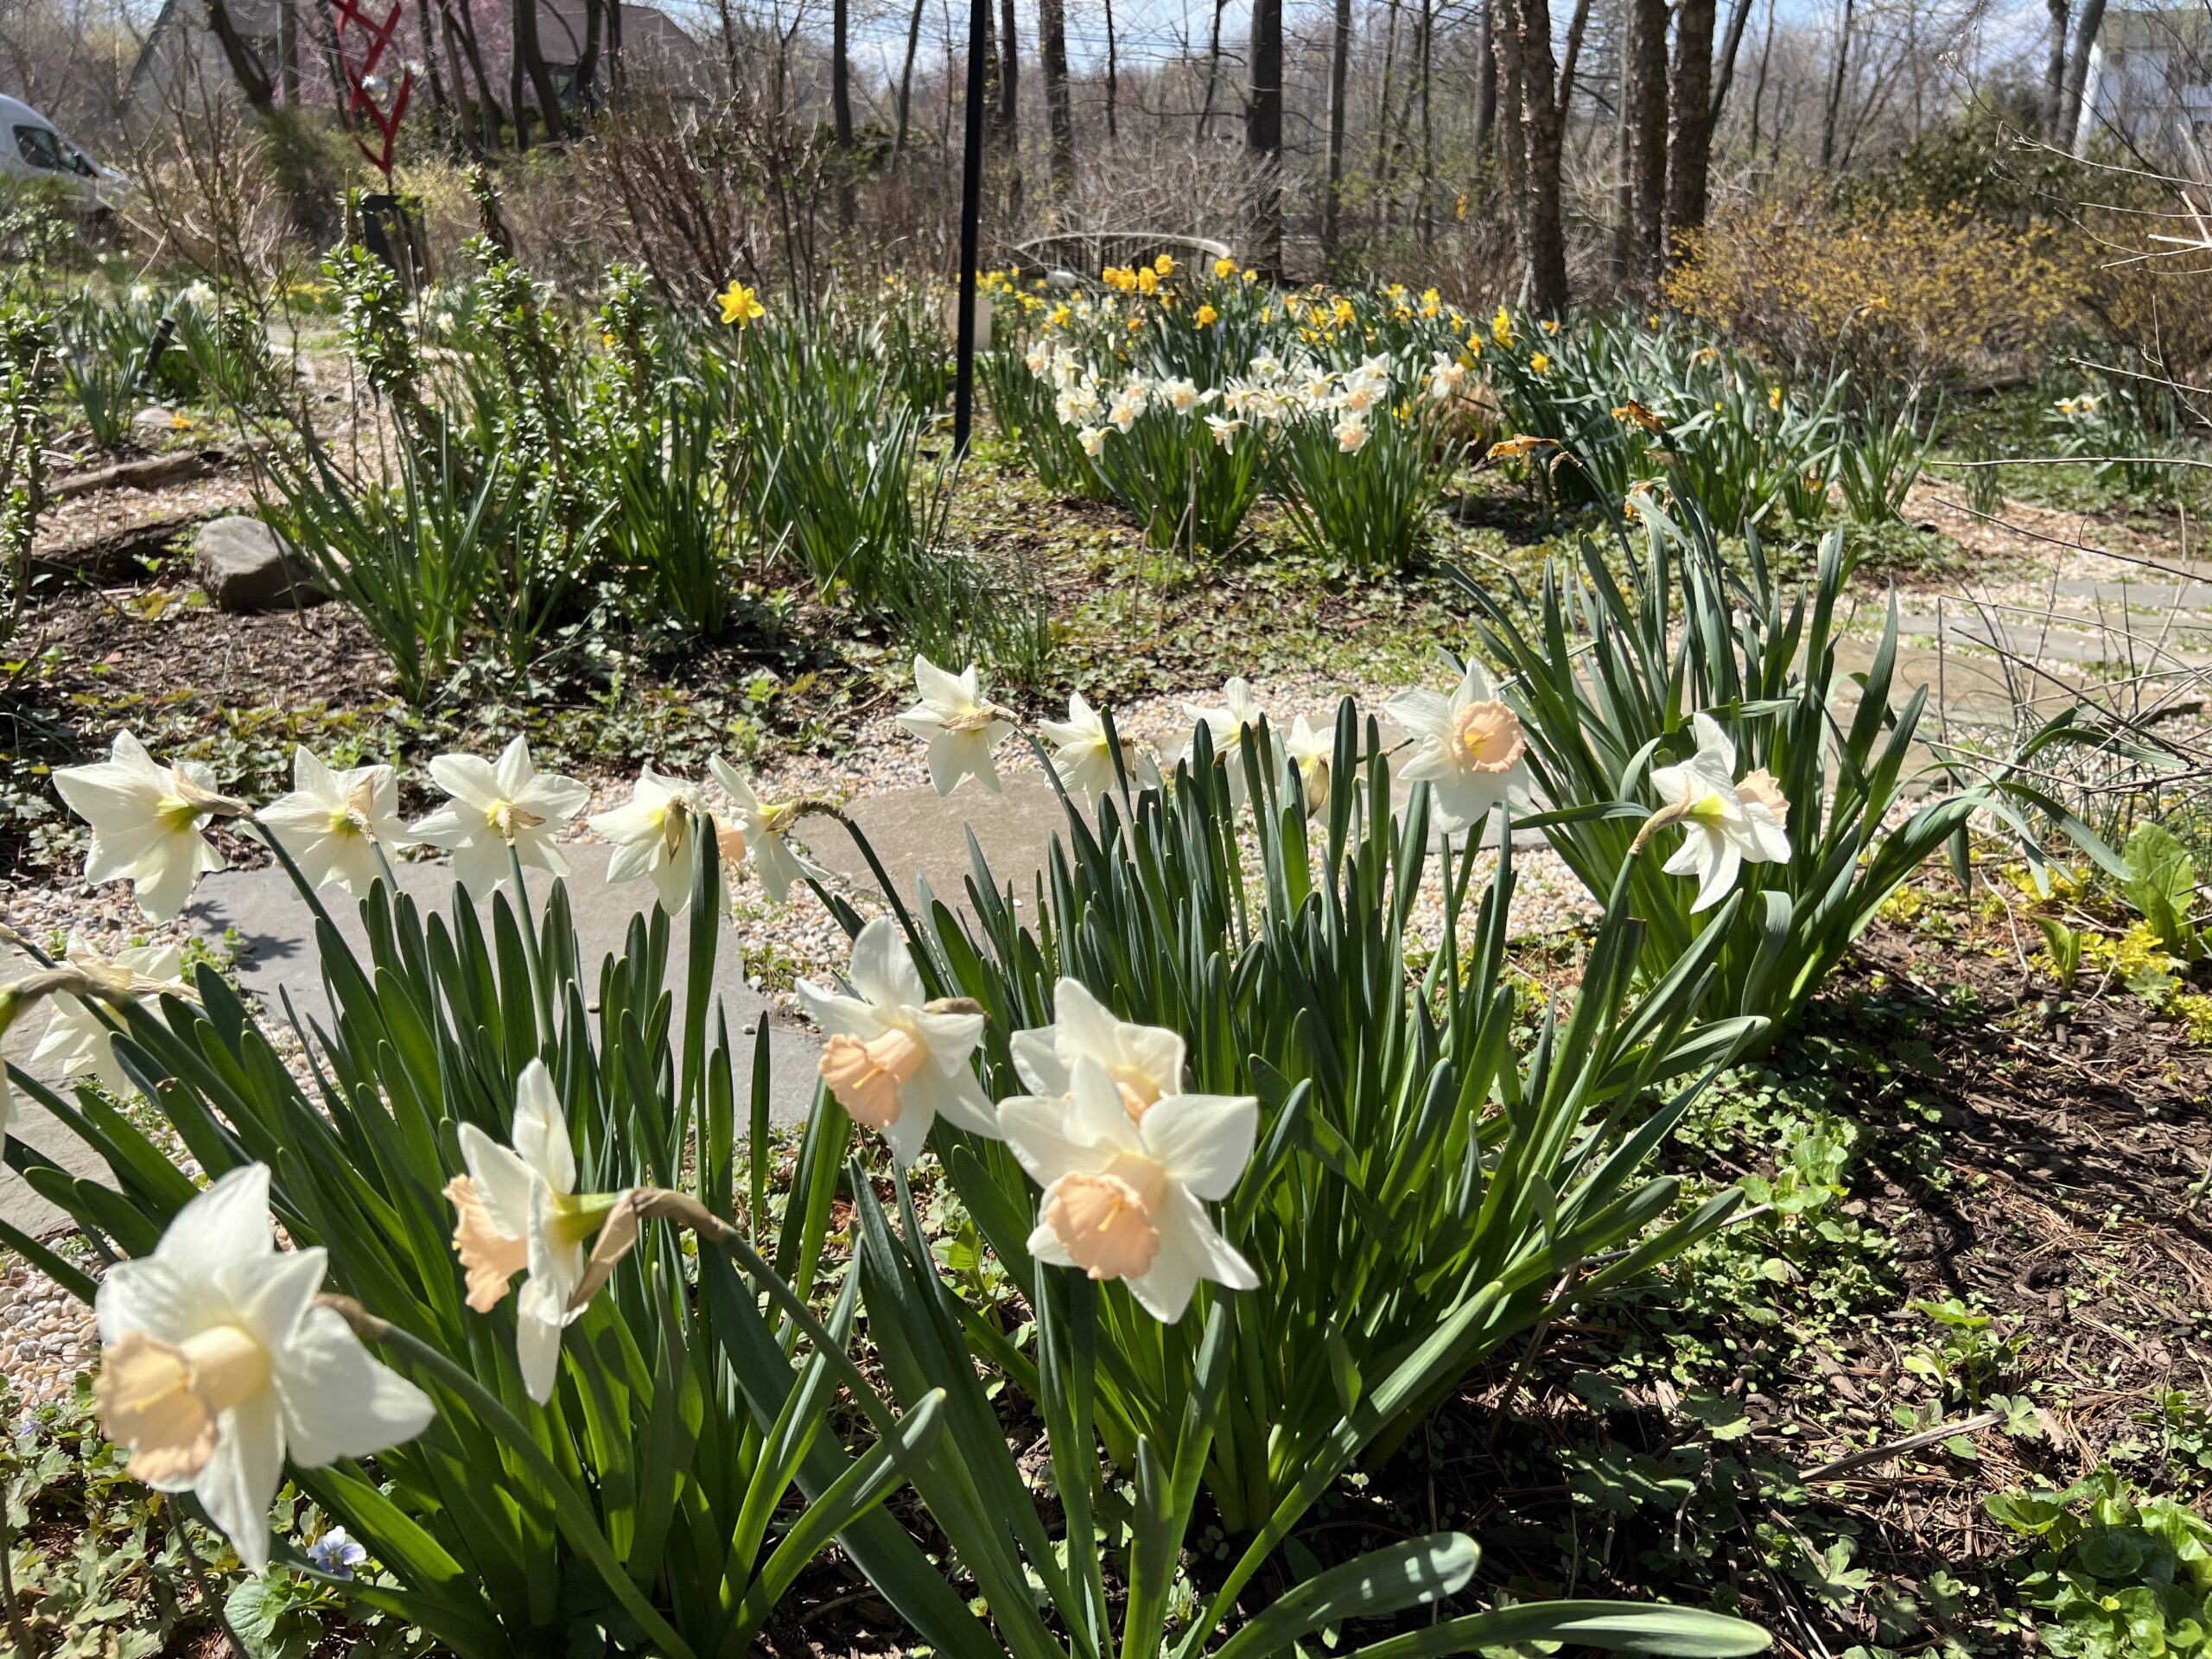
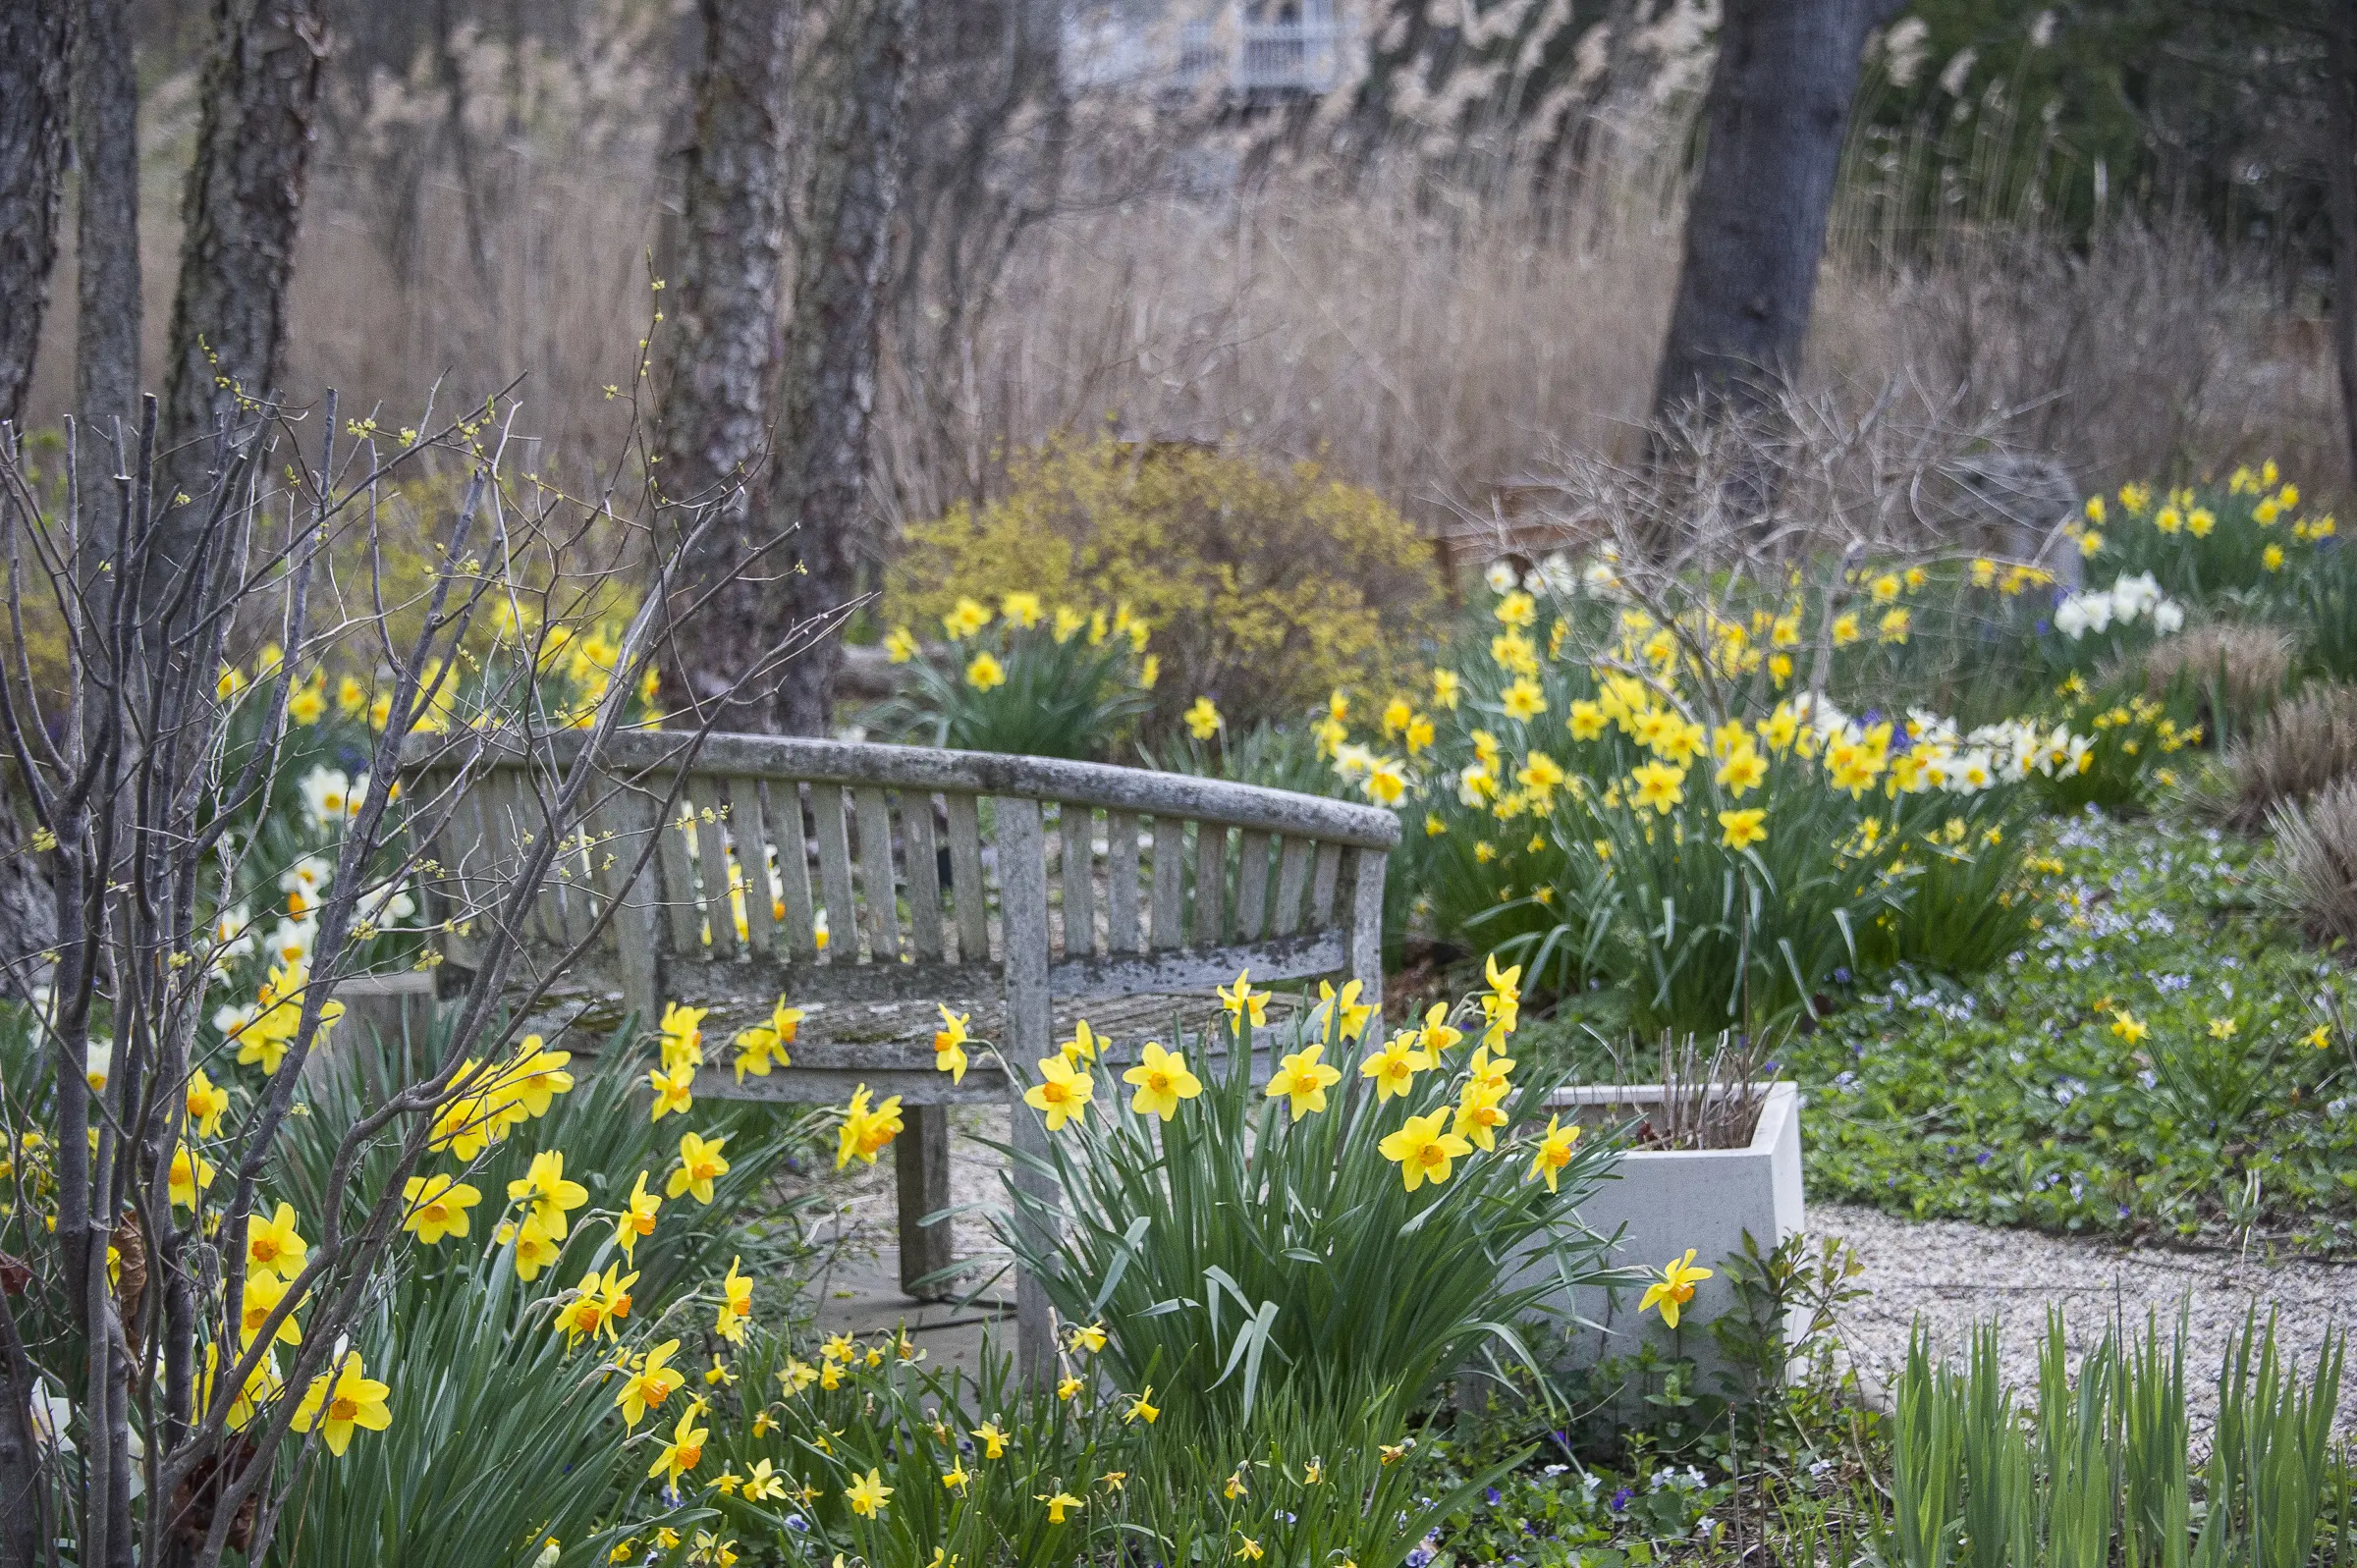
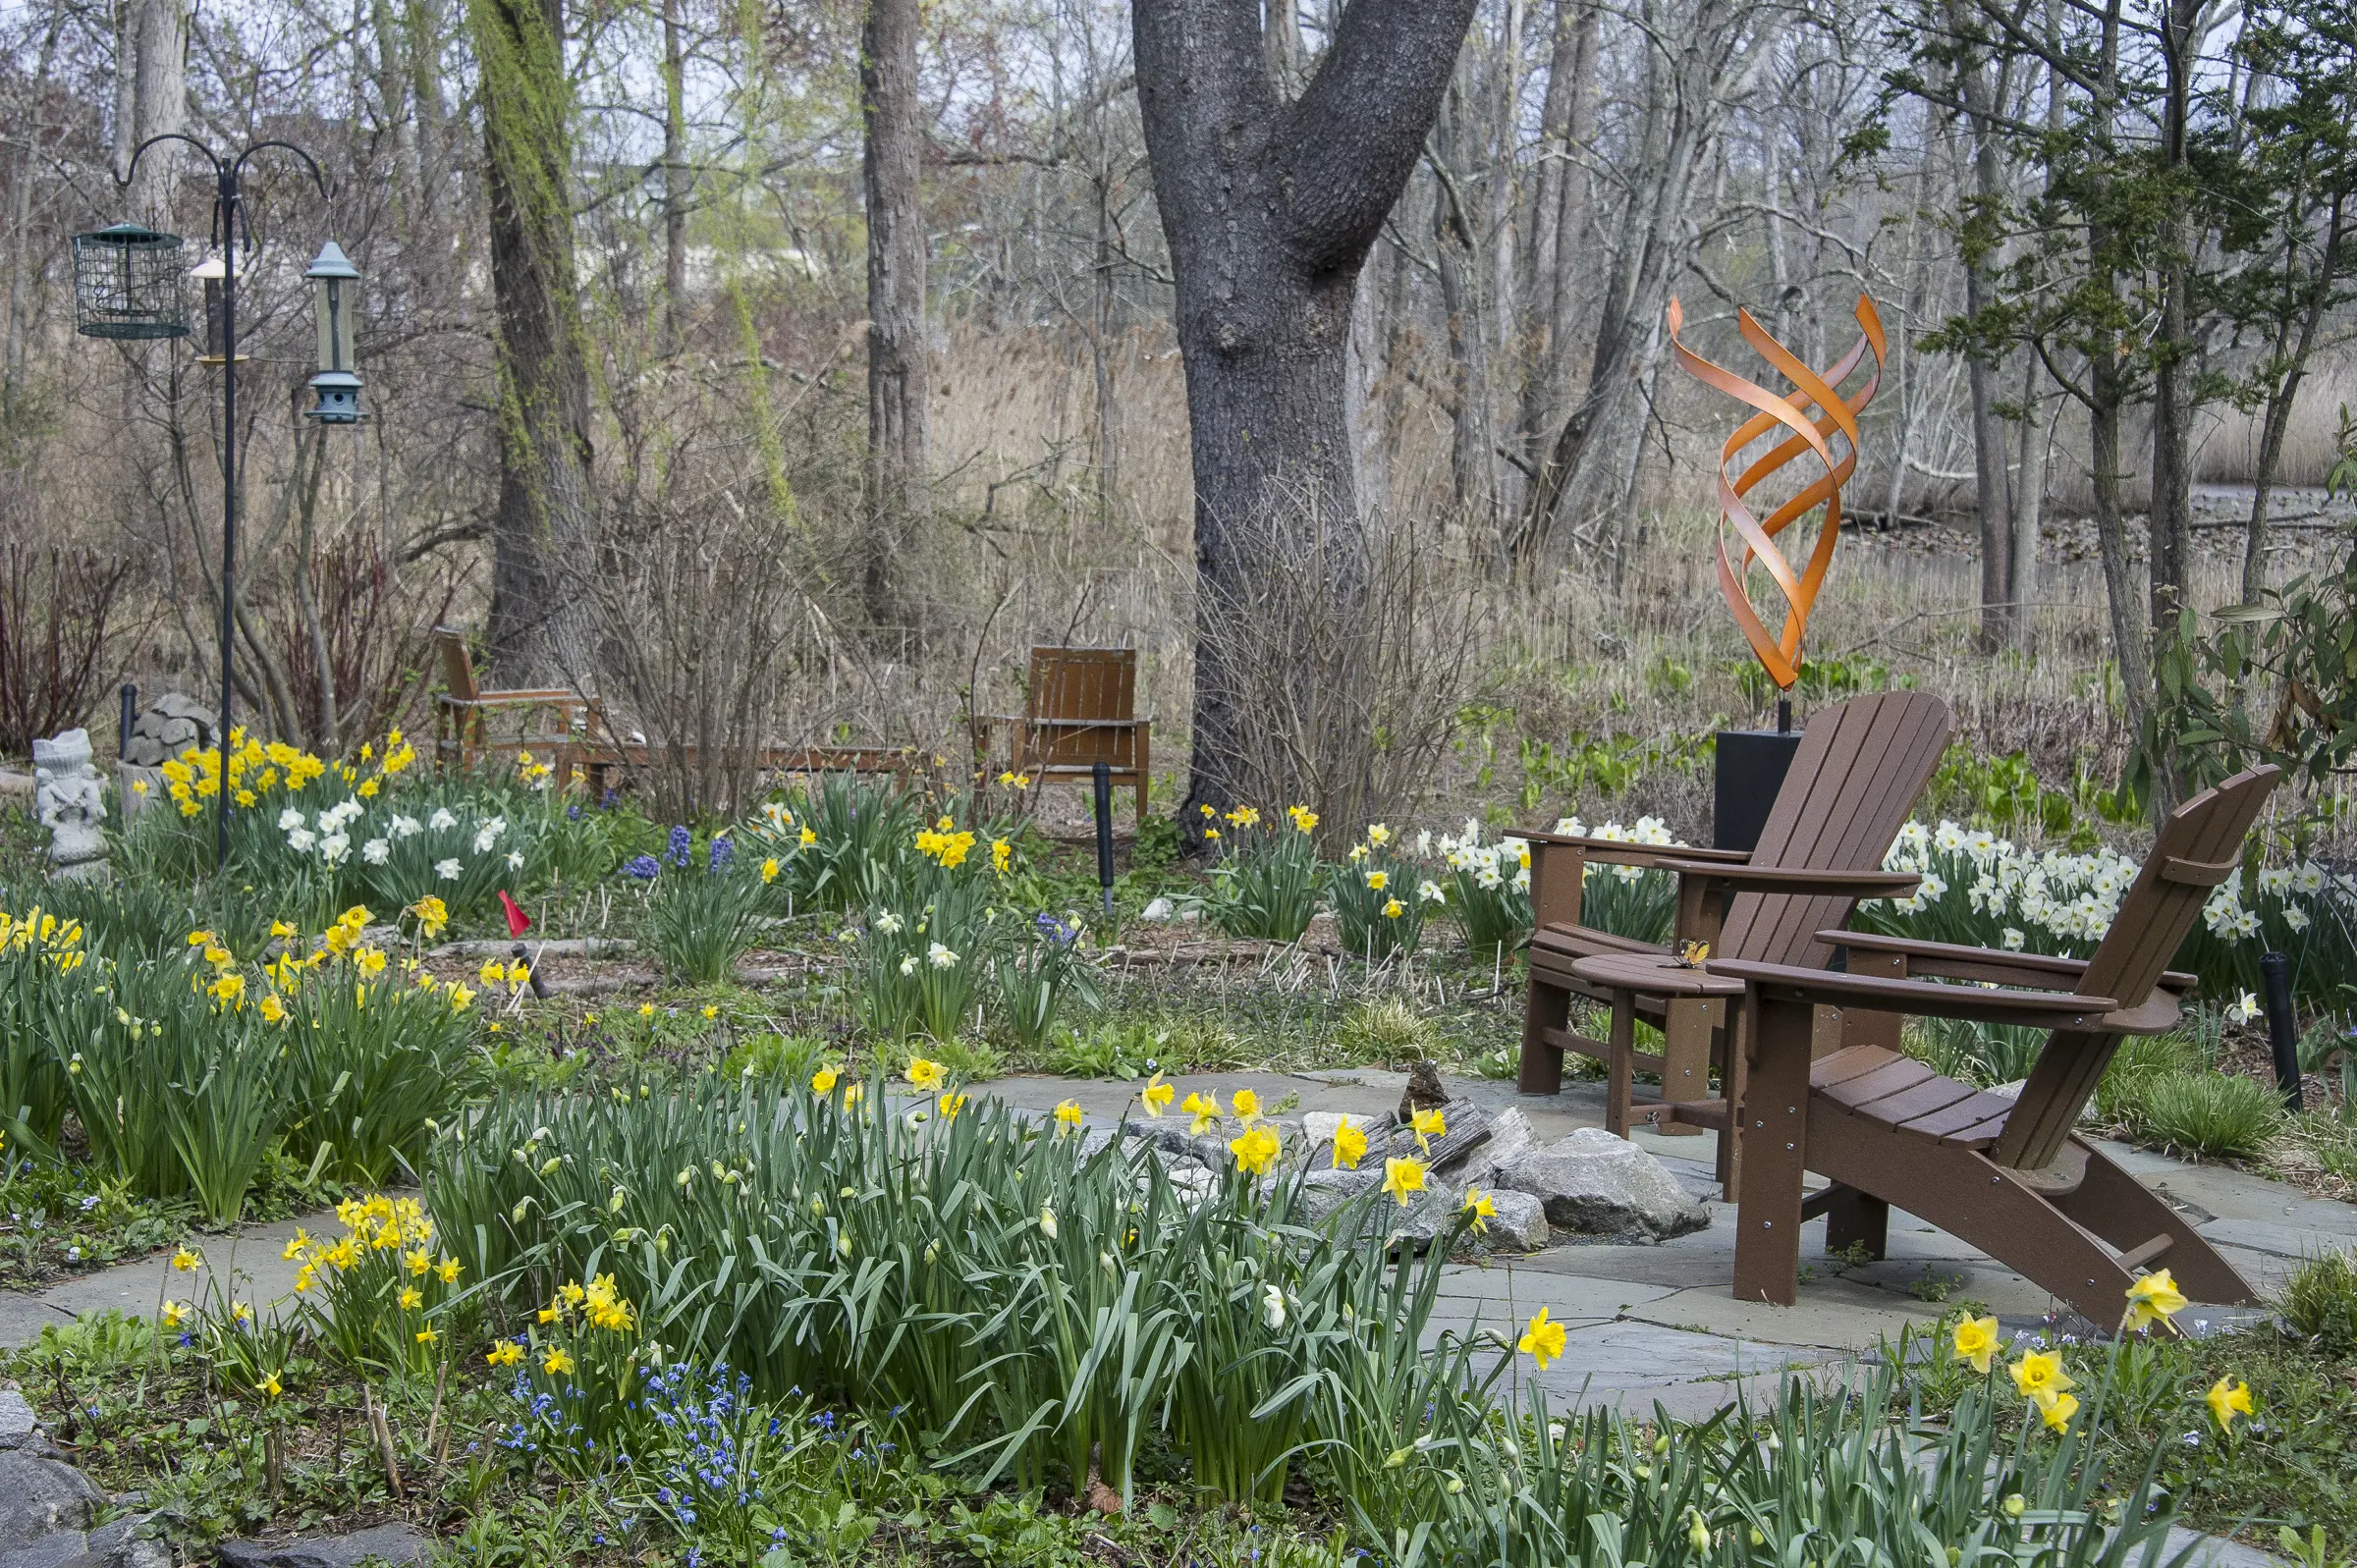
We help keep this extraordinary landscape looking spectacular by maintaining and edging the garden and bed areas. By planting a unique variety of perennials, shrubs and flowers, we’ve helped this landscape environment truly stand out with its unique landscape features.


Jay Archer, President

914-560-6570

jay@greenjaylandscapedesign.com

Filed Under: Featured Work, Landscape Construction & Installation, Landscape Design, Wetland Restoration & Storm Water Tagged With: color gardens, cup gardens, global gardens, lakefront landscape, lakeside, landscape designer, storm water management, waterfront property

What is spring without green, without color, without flowers….What is a home without a garden?

All we need to remind us what life is like without attractive, stimulating artistic landscaping is to look around the neighborhood at all the brand new construction without any green. Everyone and everything benefits from a little touch of nature ! Trees, birds, butterflies, even a well tended green lawn (hopefully poison free) adds a touch of joy, peace and happiness to our lives.


The popularity of books such as ‘Bringing Nature Home’ by Doug Tallamy or ‘The Living Landscape ‘: Designing for Beauty and Biodiversity in the Home Garden by Tallamey and Rick Darke show us what is missing from much of our landscape environments. Nature Deficit Disorder plagues our culture. The need for nature is as real as our need for clean air, fresh water and healthy food. We need nature not only for the precious resources we require to live but also to satisfy our basic intellectual and spiritual desires. Look around you and notice, observe, appreciate our beautiful world and imagine all the ways we can make it better!


Jay Archer, President

914-560-6570

jay@greenjaylandscapedesign.com

Filed Under: Featured Work, Landscape Construction & Installation, Landscape Design Tagged With: container gardening, ecosystem services, habitat gardening, living landscape, organic gardening, spring flowers

Wherever you go… there you are! Nature surrounds us! We are a part of it! Whether we are in Booth bay, Maine, Katonah, Somers or White Plains, New York there are naturally beautiful landscapes with stone as an integral part of the landscape composition.

The possibilities and opportunities for creating and designing naturalistic landscapes with locally sourced stone are incredible! For years I taught a one day course at New York Botanical Gardens called ‘Landscaping with Stone’. It was so much fun because the advantages of natural landscaping with stone are awesome. And… no pruning…no watering…no fertilizing…no light requirements, and…the deer don’t eat i! For sustainable resource management, it doesn’t get any better!

Jay Archer, President

914-560-6570

jay@greenjaylandscapedesign.com


Filed Under: Hardscaping & Stonework, Landscape Construction & Installation, Landscape Design Tagged With: custom masonry, masonry, natural stone, outdoor staircase, patio, stone staircase, stone work, terrace

10 WAYS TO A HEALTHY BEAUTIFUL LANDSCAPE

  • Take the pledge – No more toxic pesticides
  • Reduce your lawn area
  • Go organic for your lawn, trees, shrubs and gardens
  • Recycle yard waste into brush piles and compost
  • Mulch leaves and grass clippings
  • Plant native plants and natural landscapes
  • Grow your food – fruit, herbs and vegetables organically
  • Bring back the birds, bees and butterflies
  • Trees for clean air and soil conservation
  • Create a rain garden for water conservation

VIEW THE “10 WAYS” VIDEO SERIES AND LEARN HOW TO ACTIVATE THESE IDEAS IN YOUR OWN LANDSCAPE.


Jay Archer, President

914-560-6570

jay@greenjaylandscapedesign.com

Filed Under: Ecological Education, Gardening & Grounds Maintenance, Landscape Design, Organics - Lawn, Tree & Shrub Care Tagged With: ecological landscaping, green landscaping, healthy yards, landscape designer, landscape maintenance, organic gardening, organic landscape

Planting Flower Bulbs: Pure Joy

There’s only one thing more rewarding than watching your garden come to life in a blaze of color after a long cold winter–it’s seeing this all happen without any effort on your part over the last few months.

Flower bulbs placed in the ground are like little time-activated capsules, and now (fall) is the time to set your automatic spring garden in motion. Gardening in the fall is cooler, requires less watering…there’s almost no down-side to bulb planting. And the cold months that bulbs spend buried in your garden “wintering over” actually make for a more brilliant display in the spring.

Flowering bulbs are a great way to add early spring color to your landscape.

Planting Flower Bulbs: When to Plant

The best time to plant bulbs is from the beginning of October until about 6 weeks before the ground freezes. Wait until the night temperatures average between 40 and 50 degrees Fahrenheit.

Plant New Flower Bulbs

Be sure to get new bulbs. Those bulbs that never got planted last year and have spent a year in the garage are long gone. It will be a waste of time to put them into the ground. Don’t even think about it! And, be sure to plant all the bulbs you get this fall. They won’t have a second chance.

White daffodils brighten up any spring landscape!

Planting Flower Bulbs: Don’t be too quick to throw out the package!

Here’s a little problem to avoid: Try not to separate the bulbs from their packaging until they’re in position ready to plant in your garden. Various colors of the same variety (tulips, daffodils…) have bulbs that look exactly the same. You’re a goner if you throw out the label before planting!

Where Do Your Flower Bulbs Love to Grow?

And, if you want your bulb garden to flourish, don’t plant it under your favorite huge shade tree. Most bulbs do best when they’re planted in a sunny spot. Remember that label you saved? It probably says something about the amount of light those particular flower bulbs need.

Here’s a curious fact: Plants that come from a location in the world that’s below sea level (Holland) don’t like to grow in soggy soil. Imagine that! So, make sure the place you plant your bulbs has good drainage.

Planting Flower Bulbs: Prepare the Soil

Take time to prepare the soil so that your flower bulbs have a fighting chance to work their way to the surface. Loosen the soil to a depth of about 8 inches. If you really want to be kind to your bulbs, mix in a little organic matter. Those leaves you shredded (see below) would make excellent organic compost mixed into the soil. Your flower bulbs will richly reward you next spring. If you add a little fertilizer, perhaps bone meal, your bulbs will worship you as king of the universe.

And, don’t forget to remove rocks from the garden. How would you like to come to life, thinking everything was amazing, only to hit your head on a rock? Bad Bad! There’s only one thing worse: Never, never plant the bulbs with their heads facing down. They’ll try to get to China, but alas, they’ll never make it. The pointy side, as with many people you know, is the head. If you’re not sure which end is the head, plant the bulb on its side. Most bulbs are smart enough to figure out what to do in that case.

Daffodils surround a garden bench in Rye, NY.

How Deep Do You Plant Flower Bulbs?

How deep to plant your flower bulbs? As a rule, the smaller the bulb, the closer it needs to be to the surface. Plant larger bulbs (allium, iris, tulips, daffodils…) about 8 inches deep. Plant smaller bulbs (crocus, grape hyacinth…) about 4 inches deep. If in doubt, be sure to read the label you saved for this important moment.

Bulbs successfully planted? Now LOOSELY fill in the space above the bulb. Don’t pack the soil down (refer to our discussion about rocks above).

Watering Your Flower Bulbs

At this point every gardener wants to water the little guys. That’s okay. It actually helps activate them. However, remember what we said about too much water. The northeastern U.S. is fairly moist in the Fall, so unless we’re in some kind of weird climate-change drought, an occasional watering after a few sunny days will probably do the trick.

Daffodils are an excellent choice for a part shade landscape.

Where To Get Free Mulch For Your Flower Bulbs

Oh yes, about that mulch: Those leaves falling from your favorite shade tree (mentioned above) are meant to fertilize the ground they land on rather than going into some far away land fill. It’s pretty easy to help that process along. Here are some ideas:

Use a mulch mower rather than bagging the leaves and having them hauled off.

Pile the leaves in some forgotten corner of your yard and let them mulch for about a year, then dig them into your bulb garden next fall.

Instant Gratification Method:

Hire us to come over with our awesome Bear Cat Shredder (one of the few such shredders in Westchester County) and turn brush and leaves into instant mulch that you can use this fall!

Call Green Jay Landscape Design: 914-560-6570


Victory! You’ve Successfully Planted Your Flower Bulbs. Now What?

Now that you’ve successfully planted your flower bulb garden, sit back and expect a dazzling display of color and beauty next spring. Nearly zero effort! Would that raising kids could be this easy!

The only thing easier than planting a brilliant bulb garden is hiring a professional to design and plant your spectacular bulb garden, timed to bloom throughout the spring, summer and fall months.


Jay Archer, President (and Bulb Enthusiast)

914-560-6570

jay@greenjaylandscapedesign.com


Filed Under: Gardening & Grounds Maintenance, Landscape Design, Organics - Lawn, Tree & Shrub Care Tagged With: alliums, crocus, daffodils, gardening how to, organic gardening, spring bulb recommendations, spring flowering bulbs, spring flowers, spring garden, trout lily, tulips

Why have an article about rhododendron pruning in October when the best time to prune a rhododendron is late winter/early spring while the plant is dormant? We just wanted to get this information out to those ready to do an October pruning, and perhaps cause you to consider waiting.

Rhododendron Pruning for a Sustainable Garden is an art form. Learn how to prune a rhododendron plant sustainably, taking out dead and dying material and submitting diseased portions for testing to determine the cause. Remember to sterilize your pruning shears. When finished, you’ve enabled the plant to focus its energy on the living material, contributing to healthy, beautiful growth and awesome blooms.

Video Transcript

“Welcome to Green Jay Landscape Design. Here we are inspecting one of our estate management projects. So, here we have some dieback on one of our rhododendrons. Now these old plants, and all the other plants seem reasonably healthy, but we see some dieback here. However, there’s also some new growth here, so what I’m going to do is prune the rhododendron to take out that dead and damaged material.

Rhododendron With Cigarette Burns

We also see some discoloration of leaves. Something that we want to look for is cigarette burns in the leaf. This may be due to over application of fertilizer. This is a classic indication. One thing we could do is send a tissue sample out to Rutger’s Plant Diagnostic Laboratory for an evaluation. We’re going to look at this and, once again, this is completely shot. I’ll take this out. Now if this was much thicker I would need loppers. This will give it a better appearance and also reduce what I’m seeing as potential damage. It looks better already. Here’s another dead stock. I’m going to remove that. And here’s some other dead stuff, but there’s a flower here.

One thing you want to do in pruning is to be sure you’re using sharp shears that have been sterilized in a 5% Clorox solution so that you’re not taking plant pathogens and disease and transporting it from one plant to the other.

Once again, here we have some dieback, but at the same time we have some green. We’re going to remove those dead parts. We want all the energy to go to the healthy tissue: Healthy flowers, healthy stem stalks, roots. We’re going to remove any dead, dying and diseased components of our plant—as much is possible. And that’s a little example of proper rhododendron pruning technique. Thank you.”

Rhododendron Pruning Tips

RHODODENDRON PRUNING: THREE OF THE BASIC REASONS.

  • Supporting the health of the plant
  • Shaping the plant for aesthetic reasons
  • Trimming the plant back to prevent overcrowding

The second two occasions for pruning can largely be avoided if the plant has been placed in a location that supports its growth to full size. For example, if the location is too close to other plants, too close to the house or perhaps in front of a window, it’s best to select a smaller-leaved dwarf variety of rhododendron. Otherwise, as the plant grows you’ll find yourself needing to drastically trim it back to prevent overcrowding. This is not the healthiest, most sustainable way to maintain a rhododendron.

Rhododendron Pruning: Growth Cycle & Best Timing

You can prune large-leaved rhododendrons at any time of year without harming the plant. However, the best time to prune large-leaved rhododendrons is late winter/early spring when there are no flower buds, just before the plant’s annual growth cycle begins.

The annual growth cycle begins with a flush of growth that terminates with a rosette of leaves (a truss) that averages around 6 inches in length. Younger rhododendrons will produce 2 flushes per year, older plants produce one flush followed by a flower bud. Rhododendrons retain their leaves for 2 years.

RHODODENDRON PRUNING: REMOVE DEAD AND DISEASED PLANT MATERIAL

When pruning, the first step is to remove all dead and diseased wood. Follow any dead or diseased portions of the plant to where the healthy living tissue begins and make the cut there. Remember to disinfect the sheers in a 5% Clorox solution between cuts so that you don’t transfer disease from one cut to the next.


RHODODENDRON PRUNING: DEADHEADING – REMOVE THE OLD FLOWER TRUSSES

Snip the truss off about ¼ inch above the new growth (the truss is the remaining flower structure of the recent blooms after the pedals have fallen off). You might be tempted to just break the truss off, but the break could inadvertently take some of the new growth material with it. It’s safer to use pruning shears.


Some rhododendrons don’t need to be deadheaded. If the flower stalks shrivel up and disappear on their own, you don’t need to deadhead that variety of rhododendron.

RHODODENDRON PRUNING: SHAPING YOUR RHODODENDRON (BEST TECHNIQUE FOR SMALLER PLANTS)

You’ll notice rhododendrons produce a new whorl of leaves each year. Follow the whorl clusters on a branch down to the cluster you want to keep, then prune the branch about ¼ inch above that whorl cluster.

The best time for shaping is late winter while the rhododendron is still dormant.

RHODODENDRON PRUNING: REJUVENATION PRUNING (BEST TECHNIQUE FOR LARGER, LEGGY, OVERGROWN RHODODENDRONS)

Here, you’re going to remove most of the branches of your rhododendron. Cutting at strategic points will promote a flush of new growth that you can shape over the coming years.

Each rhododendron has a few primary branches. Pruning the primary branches at different heights will create a natural looking plant as the new growth emerges. Where to make the cut? Notice that each branch has tiny, pin head sized pink dots along its surface. Each dot is a tiny bud. Make your cut ½ to ¾ inch above a healthy bud (one of the larger, firmer, fuller buds). Pruning above a cluster of multiple buds will produce new growth of multiple branches. That creates a fuller, more beautiful result.

As with shaping (above), the best time for rejuvenation pruning is late winter while the rhododendron is still dormant.

RHODODENDRON PRUNING: CONCLUSION

A thoughtful, strategic pruning program is not very time consuming and will result in beautiful rhododendrons with awesome blooms!


Jay Archer, President

914-560-6570

jay@greenjaylandscapedesign.com


Filed Under: Gardening & Grounds Maintenance, Organics - Lawn, Tree & Shrub Care Tagged With: grounds maintenance, organic gardening, rhododendron, rhododendron pruning

  • « Go to Previous Page
  • Page 1
  • Interim pages omitted …
  • Page 53
  • Page 54
  • Page 55
  • Page 56
  • Page 57
  • Interim pages omitted …
  • Page 61
  • Go to Next Page »

Footer

Shop Address: 369 Bradhurst Ave, Hawthorne, NY 10532
(914) 560-6570
  • Facebook
  • Instagram
  • LinkedIn
  • Pinterest
  • YouTube
  • Houzz
  • Slide Share
  • Installation
  • Portfolio
  • Pricing
  • About
  • Contact

Copyright © 2026 · Green Jay Landscape Design. All Rights Reserved · Privacy Policy · Website and Local SEO by Ramblin Jackson